After much procrastination, I've finally set to work on part one of my son's Super Mario Brother's gallery wall. If you recall, I created a
bunk bed curtain to give him a little privacy in the room he shares with his baby brother. I promised to make him a
Mario Themed Mural in his room and because I didn't want to actually paint it on his wall, I decided to make the mural movable, that way if I move his bed to another location, there isn't a Bowser (an ugly giant dragon) staring at my newborn!
The mural itself will be four panels with four Super Mario characters on it. I started with Mario himself.
Disclaimer: This is by no means the
fine art I was complaining about not being able to do, but it keeps me loose, so we're going with it.
I want to share with you the anatomy of a painting and maybe you can glean from it tips you can use in your own wall art. Sometimes making a painting seems harder than it actually is and this project is more about using a found image, transferring it to a canvas and painting it. It can be as simple as paint by numbers or as intricate as a
da Vinci. Even you're just along for the ride, I hope you enjoy it!
Let us begin...
Photo references
When choosing a reference for a painting, you want to find an image that is crisp and easy to see. It makes a big difference when it comes to painting the image. You don't want to be squinting and trying figure out is that a shadow or a smudge?
I easily found a very basic Mario image online.
Composition
There are no right answers in art. There are recommendations though, and when it comes to composing your painting there are a few things to keep in mind. First, dead center is boring! Don't plop your image, particularly if it is a person with a lot of negative space all around it, right in the middle of your canvas.
Here's a trick I like to use. I like to fill the entire canvas with my subject. Here, I used Mario to fill the space:
As you can see the bulk of Mario's body is on the right of the canvas. Because the eye travels from the left ot right (like reading a book ) you eye follows the hand and stops at Mario's face and torso. This makes your eye follow a circle pattern. I know this can be a weighty concept to take in, but its good to keep it in the back of your mind. For some people composing a picture, like arranging furniture well in a room, comes naturally! You may not even have to worry about this!!
Transferring an Image Easily
There are two very easy ways to transfer an image to a canvas. The first involves more drawing and math, but works great when enlarging your image on a big canvas, the second is tracing and great for an image that will stay the same size.
Transfer paper is placed between the photo reference and the canvas. You then trace over the image (note the image will have to be on thin paper as photos are too thick) and the lines transfer the graphite image onto your canvas. When I use this method, I do it the cheap way and that is to draw with a pencil on the back of your image, covering it entirely with graphite and then tracing the image.
Using a grid: I used the grid method with this painting. This is the best way, besides getting your hands on an overhead projector, to blow up and image. First you draw a grid over your photo reference. To make it extra easy and to use as little math as possible, use standard photo sizes when you print out your image and pick your canvas. I printed image out to be 8x10, then chose a canvas that was 16x20. Because my image was 8x10 I used one in squares on the photo reference and two inch squares on the canvas. 16 divided by 8 is 2. 20 divided by 10 is 2. See what I mean. I enlarge the reference 2 times.
When you draw the image on the canvas you only concentrate on one square at a time until the entire canvas is filled.
Preparing the Paint
For this painting I chose to use acrylic paint. This is not the same acrylic paint you would use for say crafting, but you could use that paint if you wanted. I'm using artist grade acrylic paint in tubes. This thick acrylic needs a medium to make it workable, though there's no rule about using it straight from the tube, but you may find you go through it a LOT faster! To mix your paint, you can use as much and as little medium as you want it all depends on how thick you like your paint to be.
 |
Typical Acrylic Medium
|
I like to start with some basic colors, but I try to stick with the colors I know I'll be using in my painting. For Mario here I will be using Crimson Red, Ultramarine Blue, Burnt Siena, Burnt Umber,
Phthalo Green and white. I started by mixing my flesh colors (burnt sienna, ultramarine blue and white) and added the other colors as needed.
 |
| add medium to the paint and mix. |
 |
mixing a flesh color (white, burnt sienna and a touch of blue)
|
Painting
Start with whatever you want. I chose to start the face first.
 |
| mixing the flesh color |
 |
| That nose is a classic sphere. The elements of a sphere are what gives it dimension. |
 |
| Started dark on the outside and blended a lighter shade in the middle |
 |
| Color for nose shadow (blue and burnt siena) |
 |
| Blending |
When the nose is blended to my liking- remember no wrong answers in art! It's my painting and I'll cry if I want to!- right, after it's blended to my liking, I begin the surrounding areas.
 |
Keep some contrast when part of the face touch each other, like here were the nose meets the side of the face.
|
I continued painting the different flesh color shades of the face. I really only used three shades of the fresh color- a very light highlight (white and burnt sienna), a neutral middle shade (white, burnt sienna, and a small touch of blue) and dark shadow (burnt sienna and blue). With these three color combos I let the brush do the rest and blended to get smother transitions.
The mustache and hair are made by mixing the burnt sienna and the burnt umber together. I used more burnt sienna in the side burns and head hair and more umber in the mustache.
Mario needs teeth and you need to know something about teeth... don't make them pure white, they'll look radioactive! Teeth are almost always a variation of white-grey or beige and never pure white. This is a rule of thumb whenever you paint teeth!
The shadow inside the mouth is a combo of red, blue and burnt umber. This shadow will make the teeth pop and add dimension to the mouth. Also and this goes anytime you want something to look like it's sitting back in space. Blue is the key. Blue make things set back in the distance and red tones bring them forward. This is called atmospheric perspective because when you look at a landscape objects in the distance appear bluer than those in the foreground.
 |
adding slightly more red to the mixture makes the color for the tongue.
|
I used the same color as the tongue to make the shadow under Mario's hat. Using the same color in different parts of the painting helps to unify things.
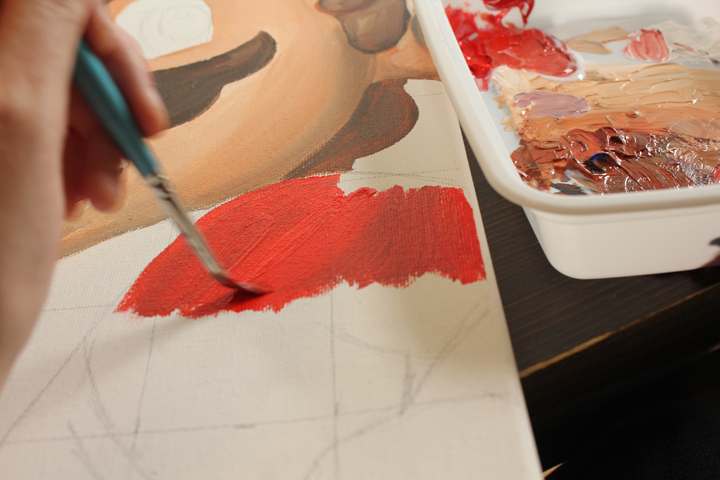
Now I break out the pure red.
 |
| Shadow color made with Red and Burnt Umber |
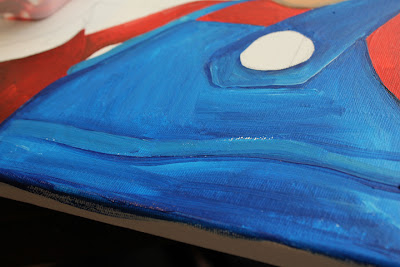
On to the blue...
 |
| Shadows made with blue and burnt umber |
Painting the eyes....
 |
Same blue as the overalls...again tying things together with color.
|
 |
Black pupils are made by mixing blue, red and green in equal amounts. I prefer mixing my own black over black straight out of the tube. It help to keep the subject from getting the "beady little eyes" effect!
|
Last the gloves and the yellow buttons. The gloves are made with white (of course) and the black I mixed for
the pupils.
Final touch a little white highlight in the eyes and we're done!
Hope you enjoyed the anatomy of a painting, even if you don't plan on doing your self!