Tuesday, June 7, 2011

Put those wall cabinets on the floor!

Every morning I sit at the computer with a cup of coffee, like a lot of other people in Blogonia (it's my new cool word, spread it like wildfire)- that by the way, is my favorite movie quote from Never Been Kissed, because well it's so ridiculous!- I'm searching, looking hard for the next kick A idea. I was doing just that the other morning when I found my next inspiration; drinking coffee and reading This Old House online. That's when I stumbled upon a great article about re-purposing wall cabinets into window seats- GENIUS! I have a bunch of wall cabinets in the garage left over from our kitchen renovation!

I went to my garage, excited to pull out those wall cabinets and get started. In my mind I imagined the dinning room table pushed up to those window seats and the family sitting down for a meal...how romantic! But it always is, in our heads isn't it? When I pulled the cabinets from the garage, reality set in as I tried to sit on the wall cabinets and instead of feeling like I was in a Louisa May Alcott novel I felt more like Norm from Cheers when I sat tall enough to reach a bar counter and have a beer!

Well, I pulled them out of the garage, I had to do something with them. Here's just the something I did.


Look at this Beauty!!


I removed the door.
Then I flipped this bad boy upside-down.


Sanded up the surface.
Primed it.
Painted it grey.
Cut the center from the cabinet door, then primed, puttied and painted the frame.
I polyurethaned the table top that I cut and added hinges so that the top flip open for extra storage!

Screwing in the hinges.
Attached hinges on the other side of the cabinet door frame.

I used push pins to put fabric in the frame. Now I can switch it out when I want to change it up a little  bit.
Backside of the door.
Notice the gap between the fabric.
I used brown ribbon to cover the gap.


A wall cabinet happily situated on the floor!


Featured at


Linked to


Tip Junkie handmade projects


Monday, June 6, 2011

Meal Planner Monday

Hi everybody! It's Monday and time for some dinner ideas!!

Okay just a shameful plug, but if the link wasn't working to this weekend's project at Scissors and Spatula's here it is again.

So here's some dinner ideas for your viewing or eating pleasure...


Recipe

Recipe
scroll down to the third entry.

Recipe


Best Meatballs Recipe

Recipe


Grand Total: $68.15

Saturday, June 4, 2011

Wall cabinet into side board- BLAM!

Hey everybody! Today I'm guest posting at


Please stop over and see how I turned this nasty thing into...hey wait! I don't want to spoil the fun. Click on over and see what I did!!


Thursday, June 2, 2011

End of the School year Teacher gifts

As the Daughter-in-Law of a school teacher, one who is the complete opposite of a hoarder, you better believe I see a lot of end of the school year presents that my Mother-in-Law does not want to keep. It's not that she doesn't appreciate it! It's just that a gal can only have so many peppermint scented candles from the dollar store, you know what I mean? This is a nagging thought in the back of my mind! I  want to give my kid's teachers, who are spectacular by the way, something that says thank you for all the time you dedicate to my children day in and day out! 

So, get them gift certificate to Starbucks or Michael's Craft store right? Well, it sounds good, but that's just not in the budget right now. The problem lies in the fact that my two children who are in school have six teachers between them and to get them a gift certificate that adequately says, You're Appreciated, would cost more than I have. It's my belief however, that what you don't have monetarily you can make up for in time and creativity! So I set to work on a heart-felt and meaningful gift for the teachers who have made such a difference in my kids life this year!

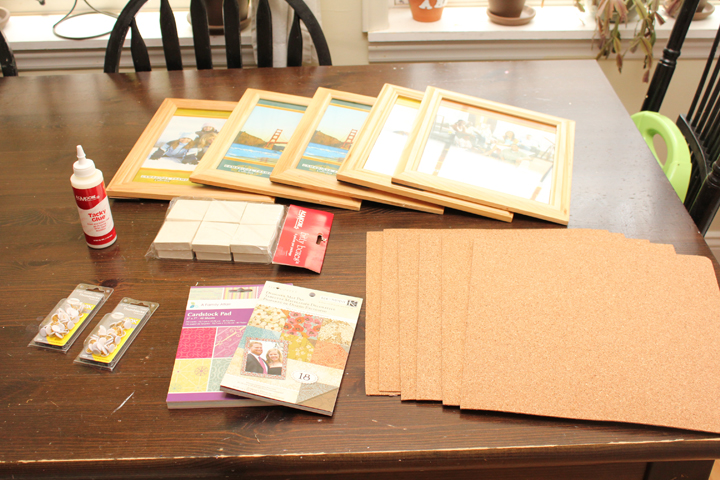
I scoured the internet looking for inspiration for my teacher appreciation gift and stumbled upon a combination of things I thought would be nice. I thought that a memo board with decorative push pins might do the trick. To the memo board I attached a little poem to add a personal touch! The board can be use in the classroom and the note can kept in a scrap book. It's a win win!!

Off to the craft store I went with all three little ones in toe! Come to think of it, in the three months Owen has been with us that was the first "only me and the little ones" outing I've done...and it wasn't that bad! I scored some great deals:


      6 8x10 Frames                           $12.00 ($2.00 each)
      6 sheets of self stick cork board  $7.14 ($1.19 each)
      large bag glass pebbles               $6.99
      Scrapbook paper                       $3.99
      Scrapbook paper                       $4.99
      Tacky Glue                                $0.79
      2 packs of thumb tacks              $2.58 ($1.29 each)
      6 small paper boxes                   $2.69

Total $41.17 divided by 6 teachers equals  $6.86 each multiplied by one day's work equals $1 million dollars for each teacher's gift (WHAT? I charge a lot for my time!).

Here's how I did it


The Push Pins
I traced the glass gem onto the paper. 

I cut the circle then glued it to the glass gem with tacky glue
(any clear-drying glue will work.)


Push Pins

Glue the push pin to the paper-backed glass gem.


Trim excess.


The Boxes for the Push-Pins

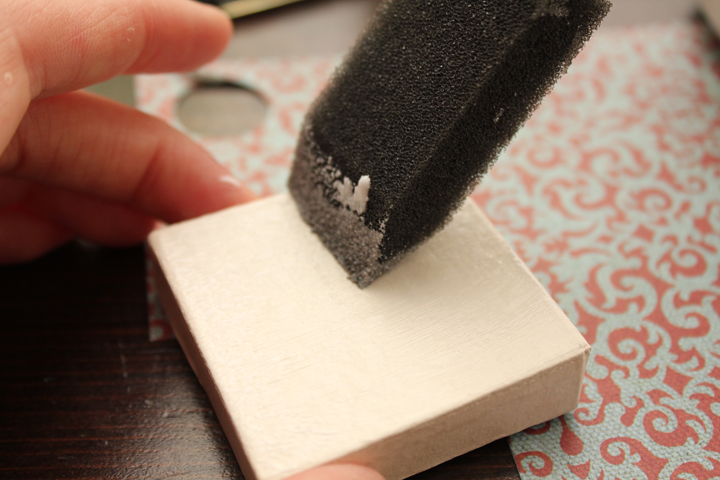
Paint the box bottoms gold.
Mod Podge the paper to the box lid.


Memo Board


Remove glass and backing.
Cut the Cork Board to size.

Remove sticky back.
Place self-stick cork to the backer of the frame.


The Poem


The Finished Product